Doing a guided trek in Torres del Paine is one of those experiences you look at with excitement, respect, and, if I’m being honest, a bit of fear. Especially if you’re thinking about hiking to Base Las Torres, one of the most famous trails in Chilean Patagonia and probably one of the most dreamed-about views in Torres del Paine National Park.
Before going, I read everything: great reviews, comments saying the pace was too hard, opinions about guides being more or less patient, and stories from people who described the hike as very demanding. All of that made me hesitate. I really wanted to experience this trail as part of my Patagonia trip, but I also wondered if it might be too much for me.
Book the guided Base Las Torres trek
In the end, everything went much better than I expected. We had a fantastic time and yes: I would strongly recommend this tour, especially if it is your first time in Torres del Paine or if you want to experience the trail with more safety, context, and support.
At parquesnacionaleschilenos.cl, the goal of this guide is to help you decide with realistic information: what the trek is like, how hard it really feels, what to pack, what practical details you should know, and when hiring a guide is worth it.
Some links in this article may generate a commission for parquesnacionaleschilenos.cl, at no extra cost to you. This helps us keep creating useful guides about Chile’s national parks.
Is a guided trek in Torres del Paine worth it?
Yes, in my opinion, doing a guided trek in Torres del Paine is absolutely worth it, especially if you are hiking to Base Las Torres for the first time. Not because the trail is impossible to do on your own, but because a guide adds something that goes beyond simply showing the way: pace, safety, weather awareness, support, and peace of mind.
When you search for information before traveling, it is normal to end up with more questions than answers. Some people say the hike is extremely hard, others say they did it without a problem, some recommend trekking poles no matter what, and others warn that the weather can change everything. And the truth is that all of them are partly right. The Base Las Torres trek is demanding, but it is also very doable if you are prepared, have a reasonable fitness level, and respect the rhythm of the trail.
In my experience, going with a guide made everything feel more organized. The guides were kind, patient, and very helpful. I did not feel pressured to rush or afraid of being left behind if I slowed down. On the contrary, the group kept a good pace without unnecessary pressure, and in the more uncomfortable sections, it was very reassuring to have someone who knew how to move through the terrain.
Why going with a guide can completely change the experience
The real value of a guide in Torres del Paine is not only knowing the route. It is knowing how to manage the group, anticipate difficulties, explain the landscape, and provide safety when fatigue or tricky terrain starts to matter.
For example, during the descent, I was especially grateful for the guides’ help. Going up is hard because of the physical effort, but going down can be more challenging than it seems. Balance becomes essential, your legs are already tired, and the fear of slipping appears in some sections. That is where a good guide makes a difference: they show you where to step, when to slow down, and how to approach more uneven parts of the trail.
Going with a guide also helps you understand the park better. It is not the same to walk through incredible landscapes as it is to do so while someone explains details about the route, the weather, the flora, the geography, and the dynamics of the trail. In my case, I remember walking near guides who, especially on the way back when we were more relaxed, shared interesting information about the park. That made the experience feel more complete.
Who I recommend this guided tour for
I would recommend a guided Base Las Torres tour if:
- It is your first time in Torres del Paine.
- You do not have experience hiking in Patagonia.
- You are worried about the weather or the difficulty of the trail.
- You want to hike from Puerto Natales with transportation organized.
- You prefer not to deal with the logistics yourself.
- You feel more comfortable walking with people who know the route well.
- You want to enjoy more and stress less.
You do not need to be an athlete, but you should have decent physical condition. In my case, I am not an athlete, although I exercise regularly and run from time to time. That helped a lot, especially during the long sections and the descent. More than mountain technique, this trek requires endurance, patience, good footwear, and respect for the weather.
Where to book the guided Base Las Torres trek
If after reading this guide you decide to do it with professional support, you can check availability and book the guided Base Las Torres trek from Puerto Natales here:
Book the guided Base Las Torres trek
At parquesnacionaleschilenos.cl, my recommendation is to book in advance, especially during high season, because Base Las Torres is one of the most popular excursions in the area.
What the Base Las Torres trek is like, step by step
The trek to Base Las Torres is usually a full-day excursion from Puerto Natales. The experience begins with a drive of approximately 2 hours to the starting area, near Estancia Torres del Paine. From there, the guide gives an introductory briefing, and the hike begins along the trail that crosses the old bridge over the Ascencio River.
After around 1 hour of hiking, you reach the Camping El Chileno sector, surrounded by lenga forest and streams descending from Mount Almirante Nieto. After a short break, the route continues toward an intermediate viewpoint located at approximately 700 meters above sea level. From that point, the trail becomes more demanding, and this is where you really start to feel the intensity of the trek.
About half an hour later, depending on the group’s pace and the day’s conditions, you reach Base Las Torres, in front of the lagoon that offers one of the most iconic views in Torres del Paine National Park: the Central, Monzino, and Dagostini towers, together with peaks such as Peineta and Nido de Cóndores, as long as weather conditions allow it. After resting, eating something, and enjoying the landscape, the return follows the same trail back to the starting point, where the vehicle waits for the drive back to Puerto Natales.
This is not just “a short walk.” It is a long day with transfers, elevation gain, breaks, the arrival at the viewpoint, and the return hike. It requires preparation from the night before, but the reward is huge. Reaching the lagoon and seeing the towers in front of you is an image that is hard to forget. Even with cold, wind, or snow, the moment has something special about it. In my case, it snowed in the upper section, and even then, the view of the base and the lagoon was incredible. You finish tired, but with a powerful sense of accomplishment.
Early departure from Puerto Natales
One of the first practical tips: the tour starts very early. That means you probably will not be able to have a relaxed breakfast at your hotel. The best thing to do is buy something at the supermarket the day before and leave it ready for the morning.
I recommend preparing a small bag with something easy to eat before leaving: bread, fruit, nuts, protein bars, or something that gives you energy without making things complicated. It is also smart to prepare your backpack, clothes, and water bottle the night before. At that time in the morning, anything you can prepare in advance makes a difference.
If you are still organizing your trip, it is best to sleep in Puerto Natales the night before to avoid unnecessary travel and arrive better prepared for the start of the tour. You can search for accommodation here:
Find accommodation in Puerto Natales
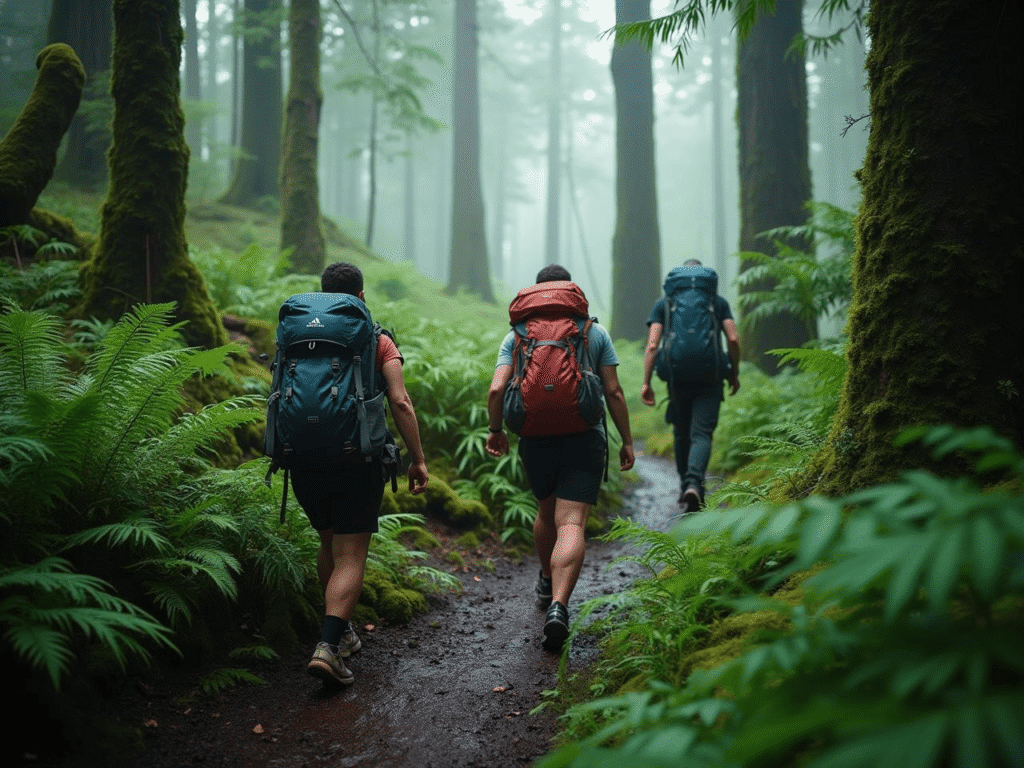
The beginning of the trail and the first kilometers
The beginning of the trail usually feels manageable, but you should not get too confident. At first, you have energy, you are looking at the landscape, adjusting your backpack, and finding your rhythm. This is where a guide helps organize the group and set a reasonable pace.
A common mistake is starting too fast because of excitement. On a long trek, you pay for that later. It is better to walk steadily, breathe well, hydrate early, and not wait until you are exhausted to eat something.
During this first section, you also start to notice the Patagonian weather. It can be cold at the beginning, warm while walking, and later windy, rainy, or even snowy higher up. That is why dressing in layers is not a minor detail: it is a key part of the experience.
The climb through the Ascencio Valley
The climb through the Ascencio Valley is one of the sections where the effort starts to feel more obvious. The trail gains altitude, your body warms up, and the backpack becomes more noticeable. Here, it is important not to fight the pace. The hike is demanding, but the goal is not to arrive first; the goal is to arrive well.
In my case, after reading so many reviews, I expected something even worse. The route is hard, yes, but with breaks, water, snacks, and a sensible pace, it can be managed. The important thing is not to underestimate it and not to compare yourself too much with other people in the group.
This is also where attentive guides are appreciated. If someone needs to adjust the pace, ask a question, or receive a suggestion, the support helps a lot. When guides are patient and know the terrain, the trail becomes much easier to handle.
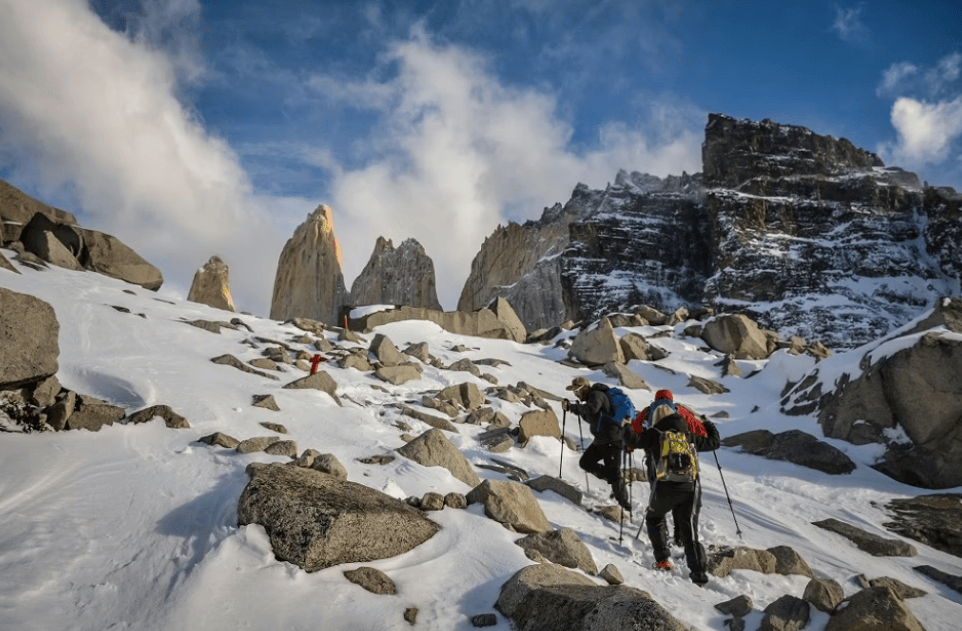
The final section to the base and the lagoon
The final section to Base Las Torres can be the most intense. The terrain becomes rockier, the weather can change quickly, and the expectation of arriving grows with every step. If there is wind, cold, or snow, the feeling of being deep in Patagonia becomes very real.
In this section, good trekking shoes or boots are essential. I also recommend gloves, because at some points you may want to place your hand on a rock or tree for better stability. It is not technical climbing, but it is terrain where moving carefully matters.
When you arrive at the top and see the lagoon with the towers behind it, you understand why so many people dream of this hike. It is a powerful image. You may be tired, cold, or damp from sweat, but the moment is worth the effort.
The return: why the descent can feel harder
Something that is not always said clearly enough: for many people, the descent can feel harder than the climb. Not necessarily because of cardiovascular effort, but because of balance, fatigue, and fear of slipping.
In my experience, going down was the most challenging part. My legs were already tired, the terrain required attention, and I started thinking more carefully about where to place each foot. This is where trekking poles help a lot. I usually prefer having my hands free to use my camera, but on this trek, I found poles highly recommended.
It was also during the descent that I valued the presence of the guides the most. One guide showed me how to go down more safely, and that kind of practical advice at the exact right moment is incredibly valuable.
How difficult is a guided trek in Torres del Paine?
The difficulty of a guided trek in Torres del Paine, especially to Base Las Torres, is high or demanding, but not impossible. The key is understanding what “difficult” means in this case.
This is not a technical route that requires climbing equipment. It is a long hike with elevation gain, changing weather, uneven terrain, and many hours of activity. That means your fitness level, preparation, and gear have a huge impact on how you experience it.
Do you need to be an athlete?
You do not need to be an athlete, but you should be in decent shape. If you walk regularly, exercise, run, or have good cardiovascular endurance, you will probably handle it better. If you live a very sedentary lifestyle, it may feel quite hard.
In my case, I am not an athlete, but I go to the gym and run regularly. That gave me a good base for the hike. Even so, I finished tired, because the trail demands effort. The difference is that the tiredness feels like part of the challenge, not like a sign that you cannot continue.
If you are preparing your trip weeks or months in advance, I recommend walking more, climbing stairs, doing routes with elevation gain, and getting used to the shoes you will wear on the trek. Do not wear brand-new shoes that day.
Which part is harder: the climb or the descent?
The climb is harder on your heart and legs. The descent is harder on your balance, knees, and concentration.
That is why some people feel the ascent is the hardest part, while others struggle more on the way down. I am in the second group: the descent felt more challenging because I was afraid of slipping and falling. It was not dramatic, but it did require constant attention.
This is where trekking poles, good shoes, and help from the guide can make a big difference. It also helps not to rush. Going down fast just to finish sooner can be a bad idea if the terrain is wet, rocky, or muddy.
How guides help with pace and safety
A good guide does not just walk ahead. They observe the group, regulate the pace, give instructions, and help when someone needs it. This is especially noticeable on a long route, where fatigue does not appear all at once but gradually builds up.
In my experience, the guides were very kind and helpful. Pablo, Millaray, Emilia, Filipe, Sebastián, Diego, and Felipe are names I associate with a positive experience: patient, friendly people who helped make a major challenge feel much easier to manage.
This matters because one of the concerns before booking a tour can be: “What if the guide goes too fast?” or “What if they do not help me?” In my case, the opposite happened. I felt that everyone was able to keep a good pace without unnecessary rushing.
Tips if you are afraid of slipping or falling behind
If you are worried about slipping, the descent, or the group pace, these tips can help:
- Wear trekking shoes or boots with good grip.
- Bring trekking poles, even if you do not usually use them.
- Wear gloves to protect your hands if you need support.
- Do not rush on the descents.
- Watch where you step, not only the scenery.
- Tell the guide if you need to slow down.
- Eat and drink before you feel completely drained.
- Do not compare yourself with faster hikers.
The trek is demanding, but you do not have to treat it like a competition. The goal is not to prove anything; the goal is to arrive, enjoy it, and return safely.
What to pack for the Base Torres trek
Knowing what to pack for the Base Torres trek can completely change your experience. In Patagonia, poor clothing or gear choices can turn a beautiful hike into an uncomfortable day. And the opposite is also true: going well prepared lets you focus on the landscape instead of the cold, wet clothes, or fatigue.
At parquesnacionaleschilenos.cl, we recommend preparing your backpack with practical judgment. It is not about bringing everything “just in case,” but about packing what you truly need for a long day with variable weather and real physical effort.
Dress in layers for four seasons in one day
In Torres del Paine, you should be ready to experience four seasons in one day. It can be cold at the start, warm during the climb, windy, rainy, and snowy in the upper section. I had some rain and snow near the top, so I would not treat this as an exaggeration.
My recommended clothing combination would be:
- Quick-dry technical shirt.
- Light fleece or mid-layer.
- Windproof or waterproof jacket.
- Comfortable trekking pants.
- Gloves.
- Hat or buff.
- Good socks for several hours of walking.
- An extra shirt inside your backpack.
The extra shirt is more important than it seems. In my case, my back became very sweaty because of the climb and the backpack. At the top, with cold and wind, staying in a wet shirt can make you freeze quickly. Changing into a dry shirt may sound like a small detail, but it makes a huge difference.
You can also leave a dry layer in the vehicle for the return to Puerto Natales. The drive back can be long, and you do not want to spend almost two hours in wet clothes if it rained.
Food, snacks, and water for a long day
Because the tour starts early, do not rely on your hotel breakfast. Buy something the day before and leave it ready. It can be simple, but it should give you energy.
For the trail, I recommend bringing:
- Protein bars.
- Nuts or dried fruit.
- Fresh fruit.
- Chocolate or an energy snack.
- A sandwich or simple food for the break.
- At least 1 liter of water.
- A reusable bottle.
In some places, you may be able to refill water, but I would not start with an empty bottle or too little water. On long hikes, hydrating from the beginning helps maintain energy and avoid crashes.
Trekking poles, gloves, and shoes: what really makes a difference
If there are three things I would not improvise, they are trekking poles, gloves, and good footwear.
Trekking poles help on the way up, but especially on the way down. They provide stability, reduce some of the impact, and give you more control on uneven terrain. Even if you like walking with your hands free, as I do, on this trek the poles are extremely useful.
Gloves are useful too. Not only because of the cold, but because you may need to place your hand on a rock, tree, or wet surface. Having your hands protected gives you more confidence.
Your footwear should be suitable for trekking, with good grip, and already broken in. Do not wear new shoes that day. Blisters or slippery soles can ruin an experience that should be memorable.
Camera or phone: what is better for photos and videos?
I brought a camera, but I barely used it. If I did the trek again, I would probably just bring my phone.
The reason is simple: during the trek, you do not always have time to stop, take out a camera, adjust it, put it away, and continue. It is much more practical to take your phone out of your pocket, capture a quick photo or video, and keep walking.
That said, turn on airplane mode. In many sections, there is no signal or very limited service, and your phone may waste battery trying to connect. If you want to take photos, record videos, and use your phone throughout the day, saving battery is key. A small power bank can also be a good idea.
What to prepare the night before
The night before, prepare:
- Backpack.
- Layered clothing.
- Snacks.
- Water.
- ID or booking confirmation.
- Cash.
- Toilet paper.
- Sunscreen.
- Sunglasses.
- Gloves.
- Trekking poles, if you are bringing them.
- Fully charged phone.
- Charged power bank.
Also check the pickup point and time. At that hour in the morning, the last thing you want is to be searching for things or wondering what to wear.
Weather, bathrooms, phone signal, and other details to know
Some details do not always appear clearly in tour descriptions, but they matter a lot when you are on the trail. Weather, bathrooms, phone signal, and dry clothes for the return may seem secondary until you are there and realize they can make or break your comfort.
What to expect from the weather in Torres del Paine
The weather in Torres del Paine is changeable, intense, and sometimes unpredictable. You can start in the cold, walk in warm conditions, face strong wind, get light rain, and find snow in the higher section. There is no need to panic, but you do need to prepare.
That is why dressing in layers is not generic advice. It is a practical strategy. If you get warm, you remove a layer. If wind or rain arrives, you protect yourself. If you reach the top sweaty, a dry shirt can save you from getting very cold.
In Patagonia, you do not control the weather: you respect it.
Where are the bathrooms along the route?
There are bathrooms at the beginning and end, in the welcome center area. There may also be bathrooms at intermediate points, some paid, and another more basic one before the final section of the trail.
My advice: bring cash and toilet paper. Do not expect city-level comfort or fully equipped facilities. On this kind of route, basic services are appreciated, but it is better to be prepared.
This is one of those small details that can improve your day a lot, especially on a long excursion.
Is there phone signal on the trail?
Do not count on stable phone signal during the trek. In many sections, there is no service, so the best thing to do is activate airplane mode to save battery.
This also helps you stay more present. You will be walking through one of the most impressive landscapes in Chile, so you do not need to be connected all the time. Use your phone for quick photos and videos, but do not depend on it as if you were in the city.
Why it is better to sleep in Puerto Natales the night before
Most Base Las Torres tours leave from Puerto Natales very early. Sleeping there the night before helps you rest better, prepare your backpack calmly, and avoid logistical stress.
If you are organizing your trip, you can look for accommodation in Puerto Natales here:
Find accommodation for your Torres del Paine trip
At parquesnacionaleschilenos.cl, we see it this way: sleeping well before the trek is also part of the preparation. It is not all about boots and jackets; arriving rested changes how you experience the route.
Guided trek vs hiking on your own in Torres del Paine
One of the big questions before doing this route is whether it is better to hike with a guide or on your own. The answer depends on your experience, budget, confidence in mountain environments, and the kind of trip you want.
There is no single correct option. Some travelers love the independence of hiking on their own, while others prefer the peace of mind of an organized tour. The important thing is to choose honestly, not out of pride or pressure.
Advantages of hiring a local guide
Hiring a local guide has several advantages:
- Helps with logistics.
- Sets an appropriate pace.
- Adds safety in uncomfortable sections.
- Understands the weather and trail conditions.
- Can explain details about the park.
- Supports the group throughout the day.
- Reduces uncertainty if it is your first time.
For me, the biggest advantage was feeling that I was not facing the trail completely alone. The route is beautiful, but it also requires attention. Having patient and helpful guides made the challenge feel more controlled and enjoyable.
Advantages of hiking on your own
Doing it on your own also has benefits:
- You can manage your own pace.
- You have more freedom to stop.
- It may be cheaper.
- It is appealing if you already have trekking experience.
- You can organize the day your way.
But that freedom also comes with responsibility. You need to organize transportation, park entry, timing, weather, gear, food, return times, and safety. If you already have mountain hiking experience and are used to long routes, it can be a good option. If not, a guide can save you a lot of stress.
My recommendation if it is your first time in Patagonia
If it is your first time in Patagonia, I would choose to do it with a guide. Not because it is mandatory, but because Torres del Paine has variables that deserve respect: weather, wind, distance, elevation gain, fatigue, and uneven terrain.
Also, if you feel excited but nervous, as I did, going with a guide helps a lot. I was afraid before going, mostly because of reviews mentioning a tough pace or a very demanding hike. After doing it, my conclusion was clear: yes, I would recommend it.
You can book the guided Base Las Torres tour here:
Book the guided Base Las Torres tour
What a good guided Base Las Torres tour should include
Before booking a guided Base Las Torres tour, it is important to check what is included and what is not. Not all tours are the same, and sometimes a price difference can come from important details such as transportation, bilingual guide, schedules, cancellation policy, or pickup point.
At parquesnacionaleschilenos.cl, we recommend looking beyond the price. On a long excursion, the cheapest option can become uncomfortable if you do not know exactly what you are booking.
Transportation from Puerto Natales
Transportation from Puerto Natales is one of the most important points. If the tour includes pickup or organized departure from the city, it greatly simplifies the logistics.
Remember that the day will be long. Having transportation arranged for the way there and back lets you focus on the hike instead of worrying about how to get there, where to park, when to leave, or how to return after a tiring trek.
Local or bilingual guide
The guide is the heart of the experience. Ideally, look for a tour with a local guide or bilingual guide if you do not speak Spanish. Beyond language, what matters is that the guide has experience on the route, knows how to manage groups, and treats people well.
In my case, the guides were a very positive part of the trip. They were kind, patient, and fun. That combination matters: when you are tired, cold, or facing an uncomfortable descent, a guide with a good attitude can change your whole day.
Group pace and support
Before booking, try to read reviews about the group pace. One of my concerns before going was exactly that: I had read comments about hard pacing or unpleasant guides. But my experience was good. I felt the group moved without excessive rushing and that the guides were attentive.
A good tour should not feel like a race. Yes, there are schedules to respect, but there should also be good judgment in supporting the group safely.
What to check before booking
Before booking, check:
- Departure point.
- Start time.
- Approximate total duration.
- Whether transportation is included.
- Whether park entrance is included.
- Whether food is included or you need to bring your own.
- Guide language.
- Cancellation policy.
- Clothing and gear recommendations.
- Difficulty level.
You can check a guided Base Las Torres trekking option here:
Check availability for the Base Las Torres trek
Final tips to enjoy the trek without suffering too much
The difference between enjoying the trek and suffering too much often comes down to small details. You cannot control the wind or rain, but you can control how you prepare, what you pack, what expectations you have, and how you manage your energy during the hike.
Do not underestimate the descent
The descent can be trickier than the climb. Not because it looks dramatic, but because it is easy to let your guard down: you are already tired, you start thinking “the hard part is over,” and that is when slips can happen.
Go down slowly, use poles if you have them, watch where you step, and do not rush just to finish. If you are with a guide, listen to their instructions. I found it very helpful to receive specific advice on how to go down without feeling like I was going to fall.
Bring dry clothes to change into
A dry shirt may sound like an unnecessary luxury until you are at the top with your back soaked in sweat and the wind hitting hard. Bringing a dry layer in your backpack is a simple decision that can give you a lot of comfort.
You can also leave another dry layer in the vehicle for the return. After walking for several hours, sitting in wet clothes during the drive back to Puerto Natales does not sound like the best ending.
Use airplane mode and protect your battery
Your phone will probably be your main camera. That is why you should take care of the battery. Activate airplane mode, lower the brightness when you are not using it, and avoid wasting battery searching for signal where there probably is none.
If you plan to record a lot, bring a power bank. You do not need a huge one; a small one may be enough for emergencies or to finish the day with battery.
Accept the rhythm of the trail and enjoy the achievement
This trek is not only about reaching the photo spot. It is about experiencing the journey, accepting the effort, and understanding that part of the beauty is precisely that it is not too easy.
When you finish, you get a sense of achievement that is hard to explain. The base of the towers and the lagoon are incredible, but the full memory also includes the fatigue, wind, breaks, guides, descent, nerves before going, and that final joy of saying: “I did it.”
For me, it became a great Patagonia memory.
Book your trek and other tours in Torres del Paine
If you have decided that you want to live this experience, here are useful links to organize your trip.
Book the guided Base Las Torres trek
You can book the guided Base Las Torres trek from Puerto Natales here:
See all available tours in Torres del Paine
All tours in Torres del Paine National Park can be booked here:
See all tours in Torres del Paine
Find accommodation in Puerto Natales
If you need accommodation before or after the trek, you can search here:
Find accommodation in Puerto Natales
Conclusion: Do I recommend a guided trek in Torres del Paine?
Yes, I recommend it. A guided trek in Torres del Paine, especially the route to Base Las Torres, is a real challenge, but also one of the most memorable experiences you can have in Chilean Patagonia.
I will not describe it as an easy walk. It is demanding, long, and requires preparation. It can be windy, rainy, cold, and even snowy. The climb is tiring, and the descent can test your balance. But with good clothing, snacks, water, trekking poles, proper footwear, and patient guides, the experience becomes much more manageable.
In my case, I started with fear because of everything I had read. I was worried about the pace, the difficulty of the trail, and whether the guides would really be kind. But everything went well. The guides were attentive, the group kept a good pace, the route was beautiful, and reaching the base of the towers was incredible.
At parquesnacionaleschilenos.cl, my recommendation is clear: if it is your first time in Torres del Paine, if you want to simplify logistics, or if you prefer to hike with more confidence, doing it with a guide is an excellent decision.
You can book the trek here:
Book the guided Base Las Torres trek
And if you want to explore other activities in the area:
See all tours in Torres del Paine
Frequently asked questions about guided trekking in Torres del Paine
How long does the Base Las Torres trek take?
The excursion usually takes most of the day, especially if you depart from Puerto Natales. You should consider the transfer, the hike, breaks, arrival at the viewpoint, the return along the trail, and the drive back. It is a long day, so resting well the night before is important.
How many kilometers do you hike?
The Base Las Torres route is usually around 20 kilometers round trip, depending on the exact starting point and trail conditions. More than the number itself, the important thing is to remember that there is elevation gain, uneven terrain, and several hours of hiking.
Is the Base Torres trek very difficult?
It is a demanding trek. It does not require climbing technique, but it does require good physical condition, endurance, and willingness to hike for several hours. The difficulty also depends on the weather, your pace, and your previous experience.
Can I do it without previous trekking experience?
Yes, many people do it without advanced trekking experience, but it is not a good idea to arrive with no physical preparation. If you are not active regularly, try to train beforehand with long walks, climbs, and endurance exercises.
What should I wear?
The best option is to dress in layers: technical shirt, light fleece, and windproof or waterproof jacket. Also bring an extra dry shirt, gloves, hat or buff, and comfortable trekking pants. The weather can change several times during the day.
Do I need trekking poles?
They are not mandatory, but they are highly recommended. They help on the climb and especially on the descent, where balance can be more challenging. If you are unsure, bring them.
Are there bathrooms along the trail?
There are bathrooms at some points, such as the beginning/end and intermediate sectors, but they can be basic or paid. Bring cash and toilet paper just in case.
Should I bring a camera?
You can, but in my experience, the phone was much more practical. There is not always time to stop and take out a camera. With your phone, you can take quick photos and keep walking. Activate airplane mode to save battery.
What happens if it rains or snows?
It depends on the day’s conditions and the decisions of the operator or guide. In Torres del Paine, weather changes quickly, so you should bring waterproof or windproof clothing and be prepared for cold, rain, wind, and even snow in the upper section.
Is it better to hike with a guide or on your own?
If you have experience, know the route, and feel confident organizing the logistics, hiking on your own can be an option. If it is your first time, if you are leaving from Puerto Natales, or if you want more peace of mind, I recommend going with a guide.
Final verification
Criteria met
- SEO alignment: the main keyword “guided trek in Torres del Paine” was used alongside natural variants such as Base Las Torres trek, guided Base Las Torres tour, Puerto Natales, difficulty, what to pack, and guided excursion.
- Experience integrated: the personal experience was distributed across the introduction, difficulty, guides, clothing, descent, tips, and conclusion, without creating a separate isolated section.
- Coverage and differentiation: the article combines practical information, real experience, guided vs self-guided comparison, packing advice, logistics, and booking links.
- Language quality: the tone is friendly, natural, and practical, without sounding like a pure commercial tour page.
- Length: the article is long and complete, with H1-H3 structure, FAQs, and integrated CTAs.
Assumptions made due to missing data
- The article focuses mainly on the Base Las Torres trek from Puerto Natales.
- The reader is assumed to be in the decision stage and may be comparing a guided tour, hiking independently, or booking other activities in Torres del Paine.
- A short affiliate disclosure was included to reinforce editorial transparency.
Concrete improvements to make the content stronger
- Add a visual table with “what to bring / what not to bring / optional” to improve mobile readability.
- Include original photos or real images from the trek, especially of layered clothing, trekking poles, and arrival at Base Las Torres, to strengthen experience and trust.